Gelly War Guide + Help Thread!
Replies
Welcome to the Gelly War guide and help thread! Here you'll find strategies for defeating the various gellies to earn their cool prizes. Whether this is your first Gelly War or you're a veteran that simply needs a refresher, I hope you'll find this thread helpful. Feel free to leave your own strategies or ask questions below.
If you're new to strategizing, please read through the blurbs I've written for each opponent that you're trying to fight. I know they can be wordy, but the intention is to teach you how to build your own sets. This is a very important skill to learn and will make battling a lot less frustrating down the line as the opponents you're fighting get stronger and more complex.
⭐ All lesser gellies can be frozen and you can use freezing scrolls 🎉. Gelatin Stomper has curses disabled and Hydragellos has freezing and stealing disabled.
[box=pink]New loot and achievements![/box]
New Loot for This Year
New achievement tiers can be found here and here.
[box=pink]On to the guides![/box]

Each Gelly War starts off with this little guy. It is the easiest opponent you'll encounter and is recommended for pets at any tier.
• This opponent only has one weapon, Purple Goo, which attacks with dark (:dmg:dark:) and earth icons (:dmg:earth:). Ideally we want to find two infinite use weapons that block these icons (:block:dark::block:earth:) in order to protect our pet from the incoming damage.
:block:dark:3 |
:block:earth:4 |
Terracoon Battle Mask and Shinwas Battle Wings are solid, affordable options for pets at tier 1 because they block the correct icons (:block:dark::block:earth:) while also having a solid amount of attack. If you're battling for the achievements with a stronger pet, I recommend looking through SubetaLodge's weapon filter for more options that better suit your pet's tier.
• The best scroll for smaller pets battling this opponent is going to be Divine Denizhen Scroll, which costs about 1mil sP to make at the Secluded Shrine. It doesn't require a ton of intelligence (8 AP) and blocks the necessary icons (:block:dark::block:earth:), plus heals your pet a little each turn (:heal:5%). If you have space for more scrolls, Morosbane Scroll is going to be the best once per battle scroll with its high attack icons, ability to heal, and very affordable price.
Divine Denizhen :block:dark:3 :block:earth:3 :heal: 5% 8 AP |
+ optional |
Morosbane :dmg:light:40 :heal: 300 HP 15 AP |
Moving on, Gelatin Glider is the next strongest opponent in the Gelly War and is recommended for pets at tier 2 or greater.
• This next gelly has more weapons than the last, and they are also more complex. It can deal five different elements of damage: dark (:dmg:dark:), earth (:dmg:earth:), water (:dmg:water:), wind (:dmg:wind:), and physical (:dmg:physical:). It can also block three different elements in varying amounts: fire, dark, and earth.
:block:dark:3 :block:earth:3 :dmg:wind:5 :dmg:light:3-5 :heal: 5-8 HP |
:block:water:4 :dmg:water:6 :dmg:light:4 :dmg🧊2 |
Clawsion Battle Wand and Luminous Saber are good picks for this opponent because together they block three of the gelly's most common elements (:block:dark::block:earth::block:water:) and don't use attack icons that the gelly can block. The Battle Wand can also heal (:heal:) your pet a little each turn and any extra healing is always a nice bonus.
• Unlike the weapon suggestions for the first gelly, these each have a mod slot. Personally I'd opt for adding attack crystals to the weapons to help the battle go a bit faster. Just remember to avoid using crystals that add fire, dark, or earth attack (:dmg🔥:dmg:dark::dmg:earth:) to your weapons as the gelly can block these. It may also be a good idea to use at least one of those slots for a dark defense crystal (:block:dark:) to add a little extra protection against the gelly's dark attacks, as they are the most common.
• For scrolls I still recommend using Divine Denizhen, as well as and Morosbane Scrolls if you have the extra AP. Because this gelly's weapons use five different icon types (:dmg:dark::dmg:earth::dmg:water::dmg:wind::dmg:physical:), Divine Denizhen is going to provide the best defense since it can block a little of every icon type. Morosbane will give you a some nice attack and heal at a great price if you have the room for it.
Divine Denizhen :block:dark:3 :block:earth:3 :block:water:3 :block:wind:3 :block:physical:3 :heal: 5% 8 AP |
+ optional |
Morosbane :dmg:light:40 :heal: 300 HP 15 AP |
Gelatin Golem
[box=pink]Gelatin Golem[/box]

This one is more or less everyone's favorite gelly since it can give out stat boosters 😄 It is recommended for pets at tier 4 or higher.
• The Golem's weapons have a lot, and I mean a lot, going on. It can deal out a little of every element and a lot of a few elements, and can also freeze and steal. Wow! But that's okay because I'll help break it down for you. When we come across opponents like this, we want to find their most common icon types and focus on blocking those. Mainly because it is often impossible to block everything and we want to focus on the things that can potentially hurt us the most.
Highest Priority ----> Lowest Priority |
:block:water: :block:dark: :block🧊 :block🔥 :block:magma: :block:earth: :block:light: :block:physical: :block:wind: |
• Averaging out the Golem's weapons, it mostly does water (:dmg:water:), dark (:dmg:dark:), and ice (:dmg🧊) attacks, followed by fire (:dmg🔥), magma (:dmg:magma:) and earth (:dmg:earth:).
:block:water:6 :block:dark:6 |
:block:dark:6 :block🔥6 |
Tier 4 can be a little difficult to find affordable weapons within because most of them are old Collection items. These two should do a decent job though. You may want to have a third constant - like Crystal Ball of Fate - against this opponent on the off chance its Necrotic Ooze steals one of your main two. It's always good to have a backup when an opponent can steal!
• I would use defensive mod crystals to fortify the blocking on your constants. They're already strong attack-wise and adding extra defense (:block:water::block🧊:block:magma::block:earth:) should help you cover your bases. However, if you find yourself having any trouble with the freezing and stealing from its Necrotic Ooze, it may be a good idea to add a Rose crystal or two instead.
• Again, Divine Denizhen is going to be very helpful here as your infinite use scroll. It blocks a little of every element so, no matter what the Golem throws at you, you'll always have some protection. Morosbane Scroll is still going to be good if you have the room for it. However, there is a small risk of its light attack (:dmg:light:) being blocked by the opponent's Shadow of Hydragellos (:block:light:) so just be aware of that.
Divine Denizhen :block:water:3 :block:dark:3 :block🧊3 :block🔥3 :block:magma:3 :block:earth:3 :block:light:3 :block:physical:3 :block:wind:3 :heal: 5% 8 AP |
+ optional |
Morosbane :dmg:light:40 :heal: 300 HP 15 AP |
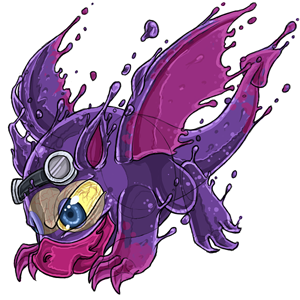
Gelashell
[box=cornflowerblue]Gelashell[/box]

This gelly mutant ninja turtle is a jump in difficulty compared to the first three opponents and is recommended for pets at tier 7 or stronger.
• Thankfully the attack elements on this opponent's weapons are less chaotic. This time we only need to worry about five different types: dark (:dmg:dark:), ice (:dmg🧊), earth(:dmg:earth:), water (:dmg:water:), and wind (:dmg:wind:).
:block:dark:75 |
:block:dark:35 |
:block:dark:30 :heal: 70 HP |
:block:dark::block:earth:16 |
:block:dark::block:earth:15 |
:block🧊:block:water:18 |
:block🧊12 :block:earth:10 :heal: 75 HP |
:block🧊:block:earth:10 |
:block:earth:45 :heal: 60 HP |
:block:earth::block:wind:18 |
• Ideally you'll want to pick two or three of the above weapons that together will help block the opponent's most common icon types. But you should also be thinking about which infinite use scroll you're going to be using as well. In this case, all of them should together be blocking some mixture of dark, ice, earth, water, and/or wind (:block:dark::block🧊:block:earth::block:water::block:wind:). The scroll that immediately comes to mind for me is Ocean Currents Scroll, which blocks ice and water (:block🧊:block:water:). If you choose to use it, then you should pick out weapons that will help block the remaining three icons: dark, earth, and wind (:block:dark::block:earth::block:wind:). This makes Comet Flash and Music Note Axe good picks. You don't have to pick this exact set, but it's an example of how you want the defenses of your constants working together.
Ocean Currents :block🧊12 :block:water:12 :heal: 8% 15 AP |
• Now that you've gotten your infinite use weapons and scroll picked out, it's time to decide what you want to do with your mod crystals. Gelashell can freeze and steal so I would opt for some mixture of Parched, Rose, or Blessing of Natural Armor crystals to protect against those.
80% freeze protection |
80% freeze protection |
100% steal protection |
50% freeze & steal protection |
50% freeze & steal protection |
• One more thing to note is that Gelashell is beatable at tier 6 if you stack your attack icons. Basically this means you want your weapons to have the same element(s) in their attacks to help maximize your damage. This helps you get past its Gelashelter and Gelaheal more easily. For example, if we wanted to stack physical icons (:dmg:physical:), picking from these would be a good idea:
:dmg:physical:27 :heal: 30 HP |
:dmg:physical:25 :block:dark:20 |
:dmg:physical:17 or 20 or 25 :block:dark:15 :heal: 35 HP |
:dmg:physical:17-22 |
:dmg:physical:15-17 |
:dmg:physical:15 :block:dark:5-10 |
:dmg:physical:14-16 :block:wind:7 :heal: 45 HP |
The only downside to this strategy is that, because we're focusing on our attack, it can leave our defense open to taking more damage. But if you're willing to take the risk, there are a lot of affordable options you can try.
Gelatin Wizard
[box=peachpuff]Gelatin Wizard[/box]

This gelly is definitely still as mean as ever and is recommended for pets at tier 10 or higher.
• If you're noticing a trend here, pretty much all of these gellies use dark attacks. The Wizard is no different. From greatest to least, the elements it uses are: :dmg:dark::dmg:water::dmg🧊:dmg:earth::dmg:wind::dmg:light::dmg:physical:.
:dmg:light::dmg:physical: :block:dark: :heal: 10% |
:dmg:wind::dmg:earth::dmg:physical: :block:dark::block🧊 :heal: 8% |
:dmg:dark: :block:dark::block🧊:block:wind: |
:dmg🧊:dmg:wind: :block:water::block🧊 :heal: 75 HP |
:dmg🔥:dmg:light::dmg:wind: :block:water::block:earth: :heal: 9% |
:dmg:earth: :block:water::block:earth::block:wind: |
:dmg:light::dmg:dark: :block:water::block:wind::block:light: |
:dmg:earth::dmg:physical::dmg:dark: :block:water::block:wind: :heal: 7% |
:dmg:dark: :block🧊:block:earth::block:wind: :heal: 10% |
:dmg:wind::dmg🔥:dmg:magma::dmg:water: :block🧊:block:earth: |
:dmg:dark::dmg:earth::dmg🧊 :block:water::block:light: :heal: 8-2% |
:dmg:physical::dmg🔥:dmg:light: :block:earth::block:light: :heal: 175 HP |
Due to how often the Wizard steals, I would equip at least three constants in case you lose one. If you want to look through more weapon options, check here.
• Thanks to the recent weapon revamp, there are tons of choices you can use! (I have to whittle them down for this guide though). So why are the above better options? They have strong single element attacks. The Wizard's Absorption Charm and Gelahealth can block all icon types. Opponents with weapons like these will stonewall you, which drags out the battle and increases the chances of dying. The best way to overcome this is to use weapons with one or two different icon types that can do a lot of damage. Another way is to beef up your weapons' attack with mod crystals. But because the Wizard can freeze and steal, that option is limited here and we want to dedicate our crystals to protection against those instead.
• Both of the Wizard's scrolls have a chance to either freeze or steal from you. Scrolls can't be blasted and one of them will be used each turn so I recommend dedicating your mod crystals to freezing and stealing protection. Further, its Gelahex has an additional chance to freeze, so be sure to have solid freeze protection.
80% freeze protection |
80% freeze protection |
100% steal protection |
50% freeze & steal protection |
50% freeze & steal protection |
Remember to spread your choices equally across the constants you're using. For instance, if you put all of your steal protection crystals onto one weapon and it is stolen, you'll no longer have any future protection against the Wizard's Goopy Snatcher Scroll.
• Finally, there are several options you can use for your infinite use scroll. Remember that we want to pick something that will block at least some of this gelly's most common icon types (:block:dark::block:water::block🧊:block:earth::block:wind::block:light::block:physical:).
Aftershocks :block:dark:5 :block:physical:5 :block:earth:7 :heal: 7% |
Ocean Currents :block:water:12 :block🧊12 :heal: 8% |
Triple Threat :block🧊12 :block:wind:12 :heal: 7% |
Divine Denizhen :block:dark:3 :block:water:3 :block🧊3 :block:earth:3 :block:wind:3 :block:light:3 :block:physical:3 :heal: 5% |
Terra Focujin :heal: 10% |
While Terra Focujin doesn't block any icons, it does heal (:heal:) your pet a nice amount each turn and costs only a bit over 1 million sP to make at the Secluded Shrine. It and Divine Denizhen are decent alternatives if you can't afford any of the pricier options.
Gelatin Stomper
[box=lightgreen]Gelatin Stomper[/box]
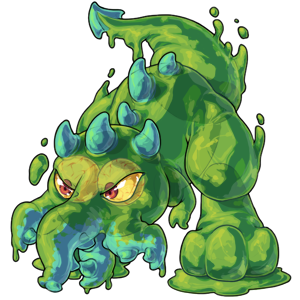
And now we've finally arrived to everyone's least favorite gelly :P This one is the most difficult of the lesser gellies and is recommended for pets that are at least tier 12.
• There is generally only one strategy for this guy and that is steal protection. Freeze protection is very important too, but if your weapons are all stolen, you're in for much more trouble.
:block:earth:100 |
:block:physical:200 |
:block:earth:130 :block🧊45 |
:block:light:45 :block🧊130 |
:block:light:40 |
One of these weapons is about to be your new best friend. Why, you ask? Because they all provide some amount of stealing protection. The Ether and Natasha generate weapons that become steal fodder, and Ornamented Hook Swords, Oracles Staff, and Sandreaver each have blessings that prevent stealing. They also all block either earth, physical, light, or ice icons, but that is secondary in importance. You're going to want to use at least one of these, or two if you can muster it, to protect against the high amount of stealing that this gelly can do.
• Now that you've picked one or two of the weapons above, you may want to find other constant(s) for your set. Ideally they will be something that blocks some mixture of the Stomper's attack, which consists of :dmg:earth::dmg:physical::dmg:light::dmg🧊:dmg:water::dmg:wind:.
:block:earth:125 :block:physical:50 |
:block:earth:85 :block:light:85 |
:block:earth:45 :block:light:130 |
:block:earth:35 :block🧊35 :block:wind:35 |
:block:earth:45 :block:water:45 |
:block:physical:40 or 60 :block🧊40 or 60 |
:block:light:65 :block:water:65 |
:block:light:30 :block🧊30 |
:block🧊125 :block:water:25 |
:block🧊60 :block:water:60 |
The weapons above would be my first choices for complementing your other weapon(s) with stealing protection. If you'd like to look through more options, click here. Keep in mind that budget options are easier to use when your pet has more stats. If your pet is on the lower end of tier 12, you may want to use the more expensive stuff because it is generally stronger.
• Again, the mod crystals to use here are straightforward because you'll want to protect yourself against this opponent's high rates of stealing and freezing.
80% freeze protection |
100% steal protection |
50% freeze & steal protection |
• Lastly, there are quite a few options we can use for our infinite use scroll.
Strength of the Paramnesia :block:physical:11 :block🧊12 :dmg:earth:9 :dmg:light:6 :heal: 9% |
Swift Blade :block:earth:17 :dmg🔥6-8 :heal: 7% |
Feather Explosion :block:physical:23 :dmg:earth:5 :heal: 7% |
Aftershocks :block:earth:7 :block:physical:5 :dmg:earth:10 :heal: 7% |
Ocean Currents :block🧊12 :block:water:12 :heal: 8% |
Unstable Fairy :block🧊0 or 30 :heal: 0 or 10% |
What you end up using is entirely up to you. However, there are a few options that might be preferable because they use icons in their attacks that the Stomper does not block (:dmg🔥:dmg:earth::dmg:light:).
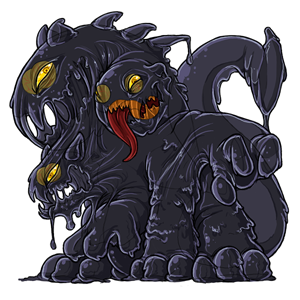
Supreme Hydragellos
[box=mediumpurple]Supreme Hydragellos[/box]
• This time around the Hydragellos has four main elements in its attack: :dmg:dark::dmg:physical::dmg:earth::dmg:light:. I recommend trying to block at least three of these. You're definitely going to want to bring in a dark blocker, and how you decide block the others is up to you.
:block:dark:100 |
:block:dark:130 :block:earth:45 |
:block:dark:50 or 65 or 80 :block:earth:50 or 65 or 80 |
:block:dark:130 :block:wind:40 |
:block:earth:125 :block:physical:50 |
:block:physical:200 |
:block:physical:110 :block:dark::block:light:0 or 66 |
:block:earth:85 :block:light:85 |
:block:light:130 :block:earth:45 |
More options can be found here. Gelatin Slayer is going to be a good pick for pets with over 6,000 HP because it doesn't have a healing cap against gelatins nor does it use any of the elements that the Hydra can block (:dmg🔥:dmg:dark::dmg:earth::dmg🧊:dmg:magma:). Sadly this makes Maniacal Essence and Hand of Goddessbane two of the worst options because they only use those icons in their attack, but you can make up for that by equipping them with attack crystals if you don't have any other weapons you can use.
• Because freezing and stealing are disabled, this frees up your mod slots for a variety of options. One is to add more attack icons to help the battle go faster. The best to use are ones that add :dmg:light::dmg:physical::dmg:water::dmg:wind: as the Hydra doesn't block these elements. Another is to add defense crystals to increase the icons you are blocking with your weapons (:block:dark::block:physical::block:earth::block:light:).
• Next we have a number of choices for our infinite use scroll.
Aftershocks :block:dark:5 :block:physical:5 :block:earth:7 :dmg:physical:6 :heal: 7% |
Tasselled Aegis :block:dark:25 :heal: 9% |
Feather Explosion :block:physical:23 :dmg:wind:5-8 :dmg:physical:5 :heal: 7% |
Strength of the Paramnesia :block:physical:11 :block:magma:11 :dmg:light:6 :heal: 9% |
Swift Blade :block:earth:17 :dmg:physical:6-8 :heal: 7% |
Mana Surge :block:magma:25 :dmg:light:6 :heal: 9% |
The one you pick doesn't matter much, because they all provide some defense to help shield you from incoming damage while healing and doing a small amount of attack in return.
• Now that you've settled on your constants for this battle, it's time to supplement your scroll set. Since freezing is disabled, we're going to focus on blocking and healing instead.
Emerging Rifts :block:dark:50 :block:light:50 13 AP |
Lucky :block:dark:75 19 AP |
Fatal Fire :block:dark:75 :block🔥75 10 AP |
Cobalt Eternal :block:earth::block🔥15 or 75 or 75 :block:dark::block:physical:15 or 75 8 AP |
Sancturia Exodin :block:earth:15 or 75 or 75 :block:physical::block:light::block🔥15 or 75 8 AP |
Gigan Blow :block:earth:50 7 AP |
Rage of the Paramnesia :heal: 5,000 HP 75 AP |
Gift of the Forj :heal: 1,500 HP 15 AP |
Emerging Rifts :heal: 10% 13 AP |
Lucky :heal: 500 HP 19 AP |
There are a lot of dark blocking scrolls, but not as many options for the other elements unfortunately. Still, many of them are great choices for complementing the icons you are blocking - or filling in the gaps for the ones you aren't - with your constants. If you have a limited amount of healing scrolls, I would try to save them for crucial moments as this is a long battle and you don't want to use them up too quickly. Remember that you can equip healers in your weapon set too, and you can even fit one more than usual considering freezing is disabled and we don't need our usual 100% freezer. Jelly Magic can be good for this because it has a 75% heal against gelatin challengers.
• A final piece of advice is to bring in your Volatile Energized Mecha, Recycle Blaster, and Soma Tablets if you have them. The Mecha is perfect for long battles because it provides a curse and a blessing that protects and heals you a little each turn. The blasters will especially be helpful for giving you some reprieve during the battle. If you can manage to blast its Supreme Hydragellos Maniacal Core, that is even better. Not only because it can do a lot of damage, but it's also the only weapon that can heal.
[box=pink]Additional advice[/box]
Supplementing Your Constants
Your constants are basically the things I've been talking about in the spoilers above. They are the two infinite use weapons (or more if the opponent can steal) and one infinite use scroll that make up the heart of your set, and the ones you'll use for the majority of the battle. You should already have an idea of what to pick for each opponent if you've read the above guides.
So what do you fill the rest of your set with? This is where the once per battle weapons, scrolls, and even potions come in. Oftentimes their listed tiers are just the ones where you can start using them and they are still useful long after your pet has grown. I've assembled a list of the most common ones used in battling below. You can also look through my weapon spreadsheet, SubetaLodge's weapon filter, and 's set advice guides (1, 2, 3, 4, 5) to learn more about what they do and find even more options.
[spoiler=Weapons]
Freezers
Moderate |
90% |
100% |
100% |
100% |
50% |
50% |
Stat Boosters
+100 Speed |
+250 Strength |
+250 Strength, Defense, & Speed |
+250 Strength, Defense, & Speed |
Blasters
Healers
100% |
50 HP |
100 HP |
150 HP |
25% |
50% |
90% |
25-50% |
75% (gellies only) |
35-25% |
10-40% |
Blessing Generators
:block:dark::block:earth::block:wind: 20 HP |
:block:physical::block🔥:block:dark::block:magma: 10 HP |
:block🔥:block:earth::block:magma: 10 HP |
:block🧊:block:water: 75 HP |
:block🔥:block:earth::block:magma: 75 or 100 HP |
:block:physical: 125 HP |
Curse Generators
72 icons |
84 icons |
85 icons |
300 icons |
300 icons |
120 icons |
107 icons |
800 icons |
Bombs
Shields
Scrolls
⭐ Scrolls that you can make yourself at either the Secluded Shrine or Genetech Lab have an asterisk (*). You can find their formulas on SubetaLodge.
Perilous Whirlpool 33% |
Cold Blast 40-70% |
Shriek of Despair 66% |
Psycho Smasher 66% |
Strong Stomp 66% |
Healers
Sticky Webs 199 HP |
Gale Force 299 HP |
Morosbane 300 HP |
Lucky 500 HP |
Gift of the Forj 1,500 HP |
Rage of the Paramnesia 5,000 HP |
Attackers
Burnt and Soggy Muffins :dmg🔥:dmg:earth::dmg:water: |
Emerging Rifts :dmg:dark::dmg:light::dmg:wind: |
Morosbane :dmg:light: |
Gale Force :dmg:wind::dmg:physical::dmg:earth::dmg:water: |
Lucky :dmg:light: |
Energy of the Paramnesia :dmg:light::dmg🧊:dmg:water: |
Infinite Darkness :dmg:dark: |
Wide Blockers
Cobalt Eternal :block:physical::block🔥:block:dark::block:earth::block🧊 |
Sancturia Exodin :block:physical::block🔥:block:earth::block:light::block:water: |
Spacial Abyss :block:physical::block🔥:block:earth::block🧊:block:magma::block:water::block:wind: |
The Void :block:physical::block🔥:block:dark::block:earth::block🧊:block:magma::block:water::block:wind: |
Narrow Blockers
Perilous Whirlpool :block🔥 |
Lucky :block:dark: |
Gigan Blow :block:earth: |
Arctic Braver :block🧊 |
Oblivijhen :block:magma: |
Typhoon of Valor :block:wind: |
Fatal Fire :block🔥:block:dark: |
Emerging Rifts :block:dark::block:light: |
* Energy of the Paramnesia :block:dark::block:water::block:wind: |
Infinite Darkness :block:dark::block🧊:block:light: |
Potions
Freezers
Moderate
Moderate
Stat Boosters
+100 Strength & Defense
Chain Freezing
Chain freezing! What is this mysterious thing that people often mention? It's actually very simple: freezing your opponent as many times as you can. When the opponent is frozen they can't fight back and they can't hurt us. Our beloved battle admin doesn't like chain freezing and thinks it makes battling boring, but we're going to try to do it anyway ;)
• Chain freezing is best accomplished by equipping as many strong once per battle freezing scrolls as you can fit:
Cold Blast 40-70% 13 AP |
Shriek of Despair 66% 15 AP |
Psycho Smasher 66% 16 AP |
Strong Stomp 66% 17 AP |
Cold Blast scales by opponent speed and has a 70% chance to freeze when it is over 4,000. This makes it the top freezer in the game for Gelatin Stomper.
• As you can see the scrolls don't have a perfect chance to freeze, but there are two other ways we can bump up our freeze rates: weapons and their modification crystals.
1% |
2% |
2% |
2% |
3% |
3% |
3% |
Mod crystals are one of the easier ways to add a little more freezing power to your set. If you need to use specific constants for an opponent, they aren't limiting as they can be added onto any weapon. Most of these crystals can be earned on your own from defeating permanent challengers (list here).
8% |
20% |
15% |
12% |
1-10% |
8 or 12% |
2 or 20% |
12% |
8-16% |
10% |
15% |
20% |
Many freezing weapons are ice (:block🧊) and/or water (:block:water:) blockers. This makes their use fairly narrow defensively. They may make sense for some opponents, but not all. However, if your pet is stronger than the opponent you are battling, you can get away with using them more easily.
• Last but not least, there are infinite use freezing scrolls.
Poisonous Barrage 10% 7 AP |
Unstable Fairy 13% 16 AP |
Gelaspell 13% 18 AP |
Unstable Fairy is the gold standard for these types of scrolls. If your pet's speed is over 3,000, it can heal you when your health drops below 50%. It is the only one of these that can heal, but all of them have their own attack and defense icons. You can use one of these for the rest of the battle after your once per battle scrolls run out.
• Oh yeah, potions exist too.
Moderate |
Moderate |
You have to re-equip these every time you use them and for that reason I don't like them. But I suppose someone out there does so here they are :P
And there you have it! If you like freezing as a strategy, using these weapons and scrolls and potions will help keep those mean gellies frozen ;)
Thank you so much for the guide :)
Thank you for this guide, and other combat-related posts.
- Puppy
Love is all you need.
where do I see where my pets AP is?
Well behaved women rarely make history [flower=cturtle]
💜 🐈⬛ 🐢
It should be listed in their stats, right below Intelligence.
Love is all you need.
thank you bestest puppy
Well behaved women rarely make history [flower=cturtle]
💜 🐈⬛ 🐢
You're welcome best little Bunny. :)
Love is all you need.
Thank you so much for making this!!!
I am not old. I am gracefully aged
Awesome guide - does anyone know how the Caring for Gellegs item is won?
[Flower=Erebid]
Lights of Sprites Cost: 6 AP 40 HP 7-8 light attack 12 dark def 7 light def
Is also great for small pets. If people are in a grinding mood between waves they can get the scroll pieces to make their own for free or may have it already from grinding.
Paramnesia
The unmatched power of the distortion of memory, arcane magic, and artisanal cheeses!
My best guess is that one will be 5th win loot from Gelatin Stomper.
Do you happen to know the minimum stats required to farm one of those scrolls? I’ve never farmed for one with a small pet before so I’m not sure which tier a pet would have to be at to have the most success.
Nope. I can't remember if I bought it or the pieces or grinded it before the reset with my army. I've seen people with small pets post they earned theirs before but I don't remember if it was one or multiple small pets.
I absolutely love it for my small pets and use it for much longer than I expected while growing them.
Paramnesia
The unmatched power of the distortion of memory, arcane magic, and artisanal cheeses!
Does anyone know if the Golems have a chance to drop their vial boosters after 10 wins?
They might! said yesterday that the gellies are going to give out random loot past the first ten wins. That may mean the golems are going to give out more dripping vials, but we really can’t know for certain until they’re released.
Thankyou for this guide, it will help so much xx
I wish I could go back in time..
If been searching, but can't find the answer. What do the dripping vials do? I guess they're stat boosters, but I can 'use' them or 'use them on pet'. What's the difference?